How to Edit/Delete an Auto Placement Template?
Admins/Custodians can edit the existing auto-placement template, search and delete the auto-placement templates and rename an auto-placement template.
To edit an existing Auto placement Template, Click the Edit button available next to the template name. You may then change value of any of the fields: Template Name, Signature Policy, Accessibility, Document, String Name, string to be searched, X and Y offset, etc. Click the Save button and a confirmation message will be displayed.

To delete an existing Auto placement Template, Click the Delete button available next to the template name. Users will receive a pop up to confirm the deletion of the template.
While creating an auto-placement template, the admin or custodian will be able to set the accessibility of an auto-placement template as Private, Public or Group.Users to whom the template has been made accessible can log in and see the auto-placement templates that are available to them based on the chosen accessibility settings. Only the Owners of the template have the capability to modify the accessibility settings for templates they have created at any time.
Users other than the owners of auto-placement templates can only use the shared templates during composing. While using auto-placement templates the users will be able to see the templates under shared templates and will be able to compose with those auto-placement templates. As the users navigate to the compose screen, they will navigate to the filters: My Templates, All, and Group.

Contact Us
Great, Thank you!
Label Creation and Configuration
MSB Admin users possess the authority to create, manage and configure various types of labels, such as numbers and text, from the admin panel. Users can efficiently search for epaks using these labels, enhancing the overall search and retrieval experience. Labels are dynamic key-value pairs designed as searchable fields.
Admins can create or delete labels, enable, or disable and can specify validation criteria for labels.
A label can be used only once for the journey of an ePak. Disabled labels are hidden from view and inaccessible to the users. By default, the created label will be open and accessible to custodians, submitters, and signers.

Users have the option to assign user-friendly names to labels and can select the type of label: Text, Number, Regex or Dropdown. If a label is marked as Required, it will be mandatory to be filled by the custodian or assigned to a signer and if assigned, it is mandatory for the signer to fill the value.Users can modify only certain properties of the labels they have created. Unwanted labels can be removed or deleted by the users.

Admins can opt for custom validation rules or choose to have no validation for a label. Users will be able to apply configurable validations to the Custom Regex label type only. Custom validation includes specifying a regex pattern and defining a custom validation message.
-Text: The user can add free text.
-Number: The user will be able to add numbers.
-Dropdown: The user can choose an option from the dropdown list.
-Custom Regex: The user will have a text box to enter a regex pattern. Once the pattern is added, user can save it.
While composing an ePak, the custodian can access all enabled labels within their tenant. The custodian can select a label and provide a corresponding value conforming to the validation rules. If a value is added to the label, the next signer will be able to view the value but will not be able to edit it.If a Label is Assigned to a signer, it is mandatory to be filled by the signer.

For Text labels with Open accessibility, the signer can enter up to 25 characters in the text label. If a custom regex pattern is applied, the user can only enter values that can be validated by that pattern. For Number labels with Open accessibility, the signer can enter up to 25 numbers in the number label. For Dropdown labels with Open accessibility, the signer can select only one value from the list of the dropdown.
In the ePak overview, labels associated with the ePak will be displayed. Each label displayed will indicate the user who added the label.
Contact Us
Great, Thank you!
Document Management System and Collaborate editing
If Document Management System and Collaborate editing is enabled for your tenant, Users may create, import, or upload a document into the Document Management System, enhancing its versatility and utility.

Click on the Create drop down button and the Document, Spreadsheet, Presentation, Forms options are available. By clicking the Document option, a document format file will be created and visible in My Documents folder. The new document will open in Only Office tool. This will be the same for other options.


Users will also have an option to create a folder and create or upload documents in that folder.

A Collaborative Editing User has the flexibility to edit and save changes to a document within Only Office. Users can also place a comment, edit a comment, remove, and resolve a comment. Users may @mention other users within documents they own or those shared with them. @mentioning another user triggers an email to that user containing the contents of the @mention comment and secure link to the document.


Users will be able to compose an ePak from the DMS. Select the document you wish to send; the details section will appear on the right side with a list of all the possible actions like Compose ePak, Edit, Move, Create, Rename, Share, Download, Clone, Transfer Ownership, and Delete. Click on Compose ePak. Users will get redirected to the compose page and the user will be able to add tags, policies, or recipients to the document.

DMS users are assured that their documents will remain secure and accessible only to those with whom they choose to share. These documents are safely stored on MSB servers.
Contact Us
Great, Thank you!
Live Photo Capture
If configured, MSB can allow Custodians to request a live photo capture of the signer at the time of signing. The custodian may choose to perform a liveness check for a specific recipient, or all recipients, of an epak. The signer has the option to review the liveness check and retake the image if desired. Upon successful completion, the live photo is added to the audit trail of the signing event, along with the date, and time of capture.


When a signer opens the ePak, they will be asked to click a live photo of themselves before proceeding. MSB will not accept a non-live human photo and the user will be asked to take photo again. Once the Liveness Check is Successful, the signer can finish signing the document.

Contact Us
Great, Thank you!
Auto Placement
MSB users can use the Auto-placement feature, if enabled for their tenant, to create an auto-placement template. Custodians can use the Auto placement template while composing an ePak to avoid manually dropping tags on the document. A Custodian user will be able to map the strings and tags on a sample document such that the same tags will be auto placed next to the string, delete the strings, and give a name to a string.
Contact Us
Great, Thank you!
How to create an Auto Placement Template?
To create an Auto placement template, follow the below steps:
1. On the Templates Page, select the Auto Placement tab and click on the Create button.

2. Add a Template Name, select a signature policy, Choose the accessibility of your document template. You can either make it Public, Private or Group and Attach a document. An error message will be displayed “Please Upload a document to Proceed” if the user tries to proceed without uploading a document.

3. Once the user has added the document, the user can proceed to enter the strings. A string will have parameters:
-Name or Label of a string ( Acceptable Length of Label)
-String to be searched on the document. ( Length of String)
-X offset and Y offset: Where the tag will be dropped with respect to the string. This will not appear the very first time when the string is decided. In this case, the tag will be dropped at (0,0) offset.

4. Once the string is decided the user can click on “Place Fields”, and the tag will be dropped on the string itself. Once the user clicks on the locate button next to the string, this button will take the user to the first instance of the string.

5. Only Signature tag can be dropped. Once the tag is dropped on the string, the offset will start to appear along with the string. To change in the placement of the Tag, user can manually add the X offset and Y offset and then values will get update in real-time without clicking any button or the user can drag the tag on the document, and the offsets will be updated.
6. Users can then click on Save to save the auto-placement template. MSB displays a success message, and this template will now be visible under ‘Templates’.
7. If the user tries to save the template without giving the auto-placement strings, a message will be displayed “Please add strings before saving the document.”
If a string is present in multiple locations, the tag will be dropped at multiple locations. The changes made at the one tag will be reflected in all the tags in the same group.
Contact Us
Great, Thank you!
How to use an Auto Placement Template while composing an ePak?
To use an existing Auto Placement template while composing a single ePak:
1. Click the Compose button and you will see an option to upload a document using Templates.
2. Click on Auto Placement Template and all templates (created by you or shared publicly) will be listed. Select the template you would like to use by clicking on ‘Add Document’.

3. Upload the document for the selected template. The user can use the auto-placement template for one document only. Click next to add the signers.
4. In the Add Recipients window, enter the name of a signer(s). Workflow will have the same policy as that of the Auto-placement template.
5. On the compose page, on the side panel, the user will be able to see an icon for assigning signers to identifiers and can search for the signers. Only those signers can be searched that were added to the workflow previously. All tags associated with the identifiers will be assigned to the same signer.

6. Click on Send ePak and a success message will be displayed.
Contact Us
Great, Thank you!
Bulk Stamp Paper
Click on “Actions” button and click on “Add” to upload a stamp paper into the system. Select Bulk Stamp Papers to add multiple stamps in one go. Download the CSV file to add details.
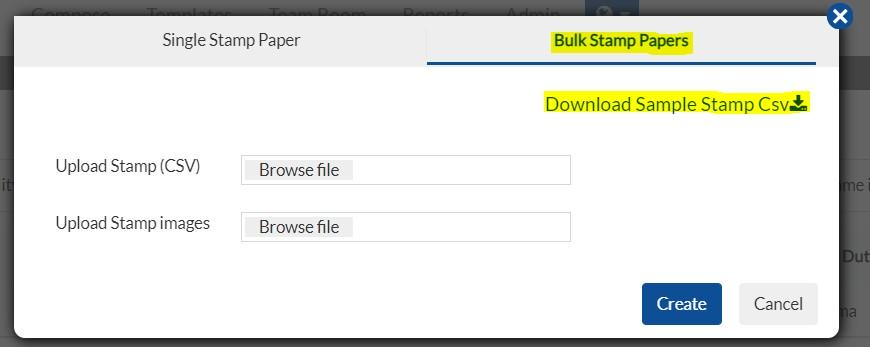
Fill all the details in downloaded CSV file and upload the same in Upload Stamp (CSV) option and Upload Stamp images renamed as Certificate no

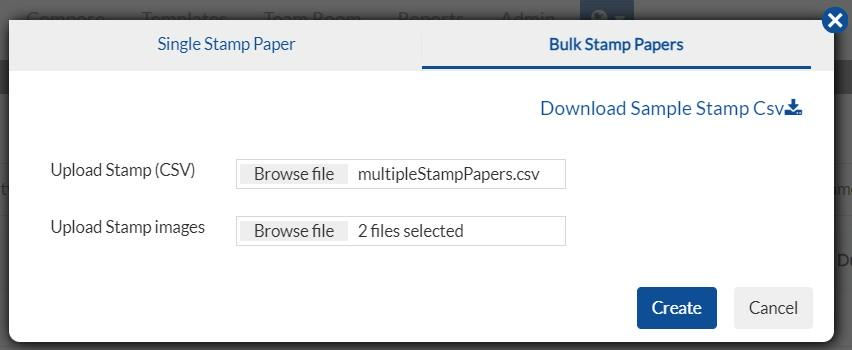
Click on Create and Assign the stamp papers to required custodians. Note: Edit, delete, and view functions are similar to single stamp papers.
How to create ePak using stamp paper
- As an assignee, login to your account under custodian/admin role and click on compose an epak and click on Attach.
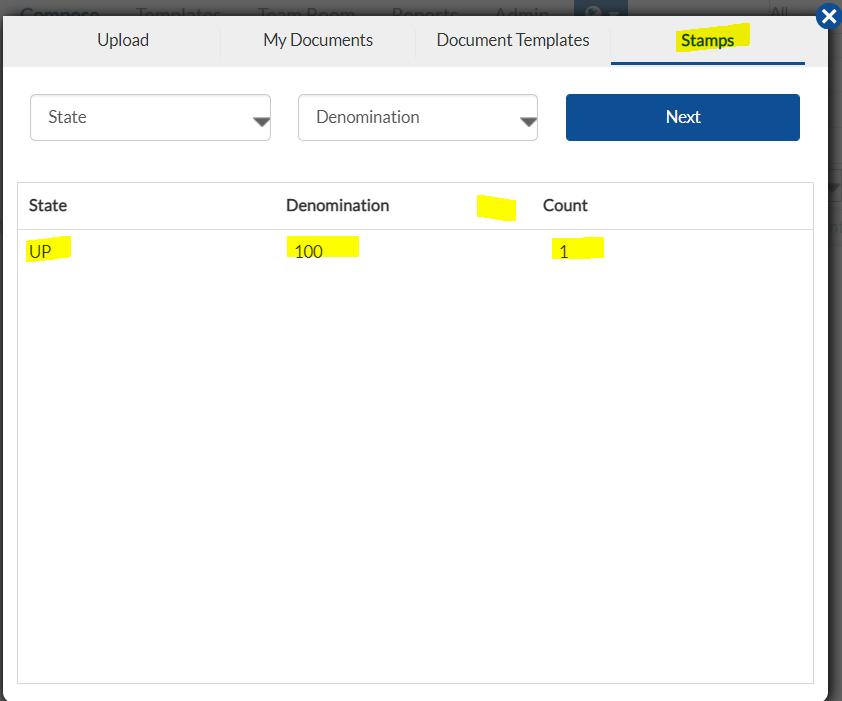
- Here Click on Stamps option and find the assigned Stamp paper to be used.
- Select the stamp paper and click on Next
- It will give an option to upload the document to be attached with this. Note: it has to be a pdf file
- Click on upload all
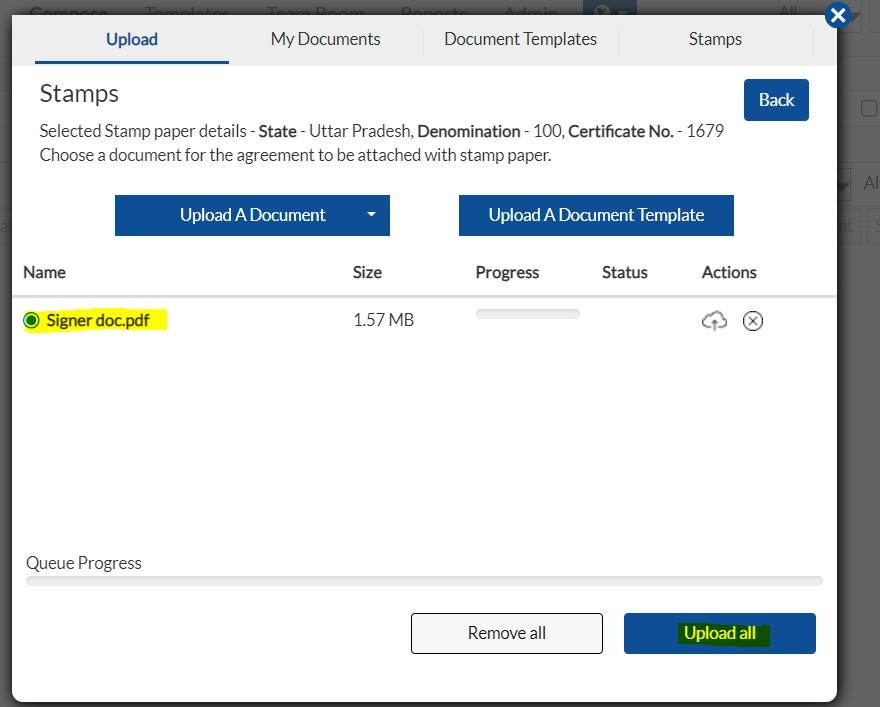
- The document will be uploaded along with the attached Stamp paper, the stamp paper being the first page followed by the document.
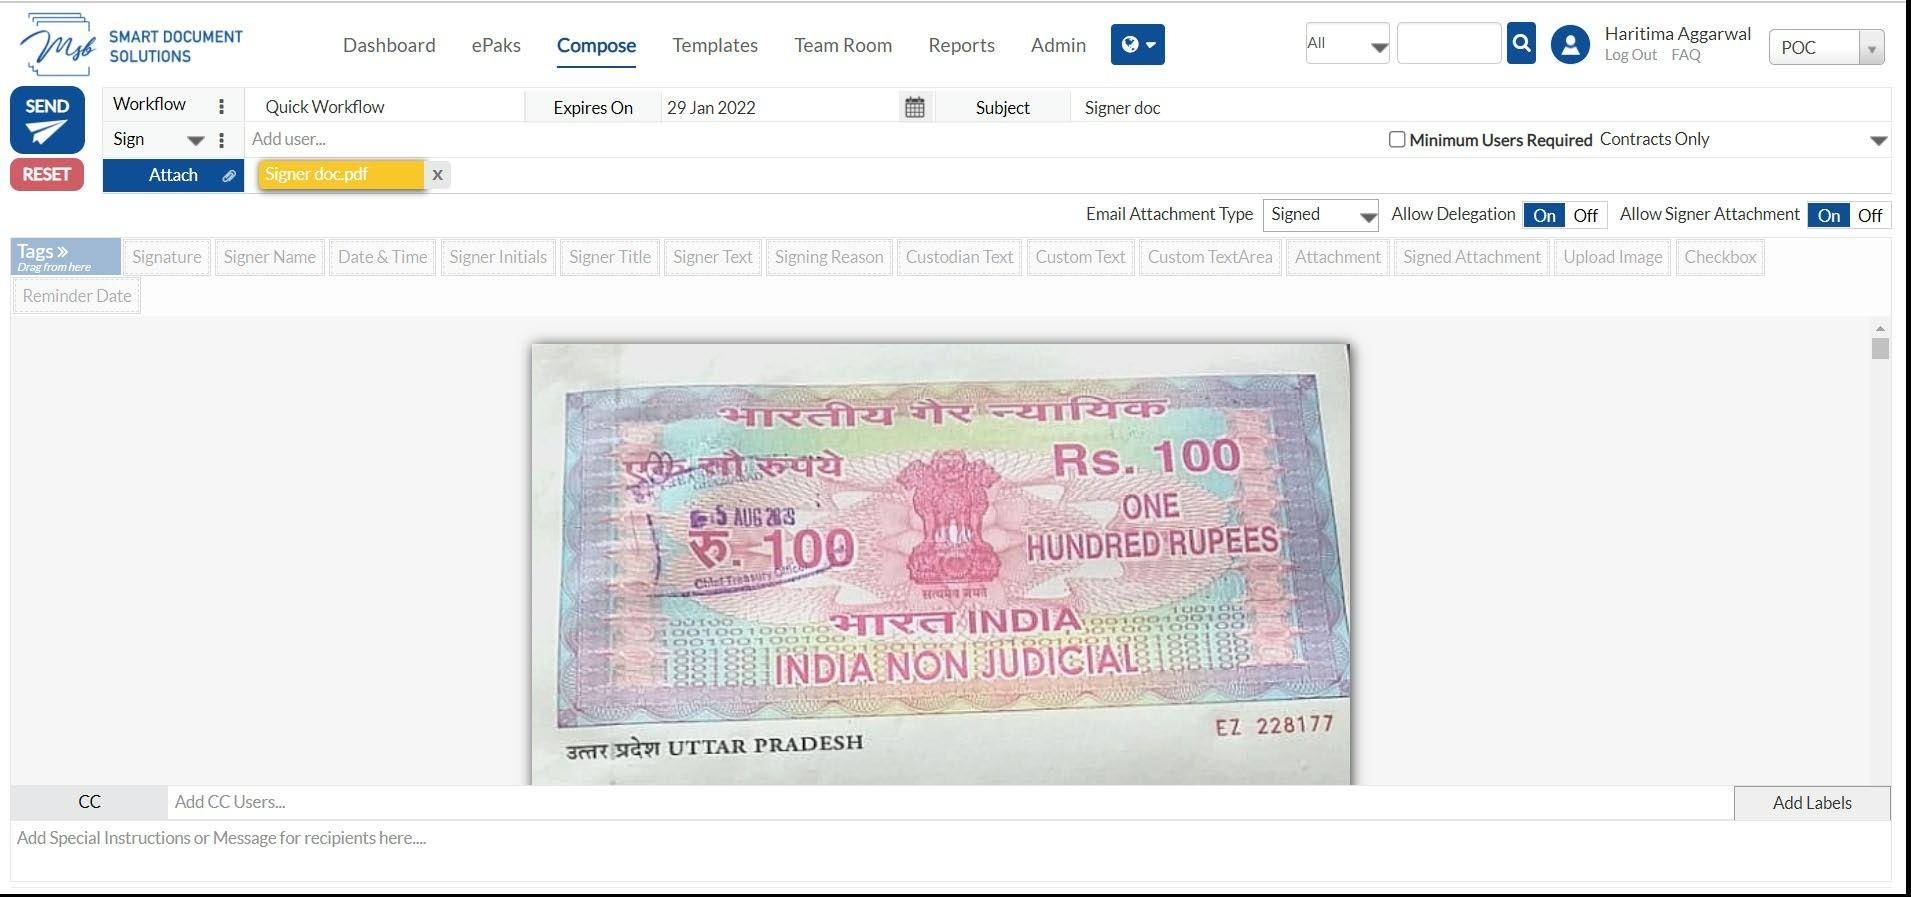
- Drag and drop the required signature tag and send it to signer to complete the process.
Bulk Stamp Paper
1. Click on “Add” button to upload a stamp paper into the system. Select Multiple to add multiple stamps in one go. Download the CSV file to add details.

2. Fill all the details in downloaded CSV file and upload the same in Upload Stamp (CSV) option and Upload Stamp images renamed as Certificate no.


3. Click on Create and Assign the stamp papers to required custodians.
How to create ePak using stamp paper
1. Login to your account under custodian/admin role and click on compose.
2. Upload a document, click on the 3 dots, and select ‘Use with Stamp Paper’. Select the stamp paper by clicking on Use Stamp Paper.


The document will be uploaded along with the attached Stamp paper, the stamp paper being the first page followed by the document. Drag and drop the required signature tag and send it to the signer to complete the process.

Contact Us
Great, Thank you!
Perform semantic text comparisons between PDFs.
MSB users can perform semantic text comparisons between PDFs using a link named “Compare”. After getting on Compare page, user will have the option to upload any allowed format file and MSB will convert the file to PDF before rendering it on screen. Compare page will be separated into 2 views where the left side will be named “Add First Document” and the right side named “Add Second Document” and user can see the comparison between two files side by side. This feature is configurable.

Upload the documents you would like to compare and click on Compare Documents at the top right corner.

User will be able to see the difference in the documents. Choose any document by selecting the checkbox that you would like to proceed with.
Perform semantic text comparisons between PDFs.
MSB users can perform semantic text comparisons between PDFs using a link named “Compare”. After getting on Compare page, user will have the option to upload any allowed format file and MSB will convert the file to PDF before rendering it on screen. Compare page will be separated into 2 views where the left side will be named “Add First Document” and the right side named “Add Second Document” and user can see the comparison between two files side by side. This feature is configurable.


Upload the documents you would like to compare and click on Compare Documents at the top right corner.

User will be able to see the difference in the documents as shown in the screenshot below. Choose any document by selecting the checkbox that you would like to proceed with.

Contact Us
Great, Thank you!
MSB can capture geographical coordinates of the signer.
MSB can give a custodian the functionality to enforce Signer to share their geographical location during Signing if the system is configured to do so. Signer should allow the browser to share the location with MSB application before starting the signing.
If an ePak has geolocation turned OFF, then the text “Geolocation was not requested by custodian “will be shown in ePak activities as below:

However, if an ePak has geolocation is Mandatory, then this is how the activities will look like:

A new action called Geo Location is captured in the e-Photocopy Audit Trail which will get added just before the ‘signed’ action. Details to be added along the action are, Image of the Location, Geolocation Coordinates, and Geo Location. Geo Location is incorporated into the activities section on the ePak details page, and each activity includes Image, Geo Location Coordinates, and Geo Location.
MSB can capture geographical coordinates of the signer.
MSB can give a custodian the functionality to enforce Signer to share their geographical location during Signing if the system is configured to do so. Signer should allow the browser to share the location with MSB application before starting the signing.

If an ePak has geolocation turned OFF, then the text “Geolocation was not requested by custodian “will be shown in ePak activities as below:

However, if an ePak has geolocation is Mandatory, then this is how the activities will look like:

Contact Us
Great, Thank you!
MSB Smart Forms
Smart Forms offer Custodians the ability to organize data collection and access structured form responses. If the feature is enabled, MSB users will be able to create new Smart Forms, upload documents, drop tags, and save the form. Smart Form signers will be able to upload multiple document attachments one by one.


After uploading the document, users will be able to drop the tags and the signing policy will be selected as Contracts Only by default. Users will be able to see the previously created and the newly created forms. They can also view, edit, and delete the existing document present inside the form.
A custodian will be able to add the users in a sequential order in the Smart Forms as in the existing workflow setting. In Smart Forms, only Signing state will be available and as of now, only one user per state can be added. It is not mandatory to add the recipients in the signing state and the first state will always be empty.


Admin/Custodian users will be able to generate a public link or a scannable QR code for the form template and copy and share the link. User can set an expiry date of the link after which the form will not be accessible using the link. When the signer clicks on the smart form public link, they will be redirected to the form.


The owner of the forms will be able to see the responses on the form. All the forms signed successfully will be moved to the Completed folder and the forms still pending for signatures will be present in the Pending folder.
A custodian will be able to add the users in a sequential order in the Smart Forms as in the existing workflow setting. In Smart Forms, only Signing state will be available and as of now, only one user per state can be added. It is not mandatory to add the recipients in the signing state and the first state will always be empty.

Users can also close the link before the expiry date has been reached and once it is closed, the form will not be accessible using the link.

Users can select the start and end date and download the reports to get insights from the data filled in the forms. The report will have data in a single row for each response. All the tags filled by the same signer will be grouped and the tag names will be present in the Column Headers and the values will be present under it.


Contact Us
Great, Thank you!
Contact List
An admin/custodian can organize their contacts by creating contact lists within their contacts and include users from excluded or external domains, providing flexibility in selecting recipients and simplifying the process of sending epaks to multiple recipients simultaneously. When a new contact list is created, the same will be visible under the contact lists filter.


A user can send the epak to all these users at once on the contact list. Users will be able to remove contacts from the contact list, change the name or delete the contact list. The user may search for contacts present in the database and add them to the existing contacts or add/create a new contact to the database. The excluded domain contacts will be kept personal to the custodian that added them. Users can select Recipients from Contacts while composing an ePak.

Contact Us
Great, Thank you!
Webforms (Configurable)
MSB now offers webform support. Signers may add, edit, and delete data in a webform, and the data will be prefilled into a document ready to sign. Administrators may link an external webform document to any MSB Document Template and map the webform fields to the Document Template fields.
Steps to create webform mapping in MSB:
Prerequisites:
- User must have Admin role.
- User must have created workflow template and document template (with form filled PDF) to be used in webform mapping.
- Navigate to Admin dropdown and select Webform mapping.

- Click on Create new mappings.

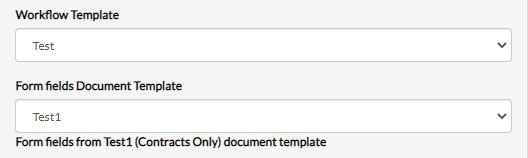
- It will automatically fetch initial workflow and document template for mapping. However, Admin can always choose by clicking on dropdown if there are multiple options available for workflow and document templates.
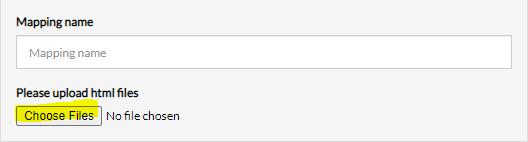
- Provide mapping name and upload the html file which contains all information for all available webform fields that can be linked.
- After upload, it will show the form fields which can be linked with system fields. Choose any field from uploaded file and then choose one/more field from system fields which you want to link. Click Link Selected fields to link them.
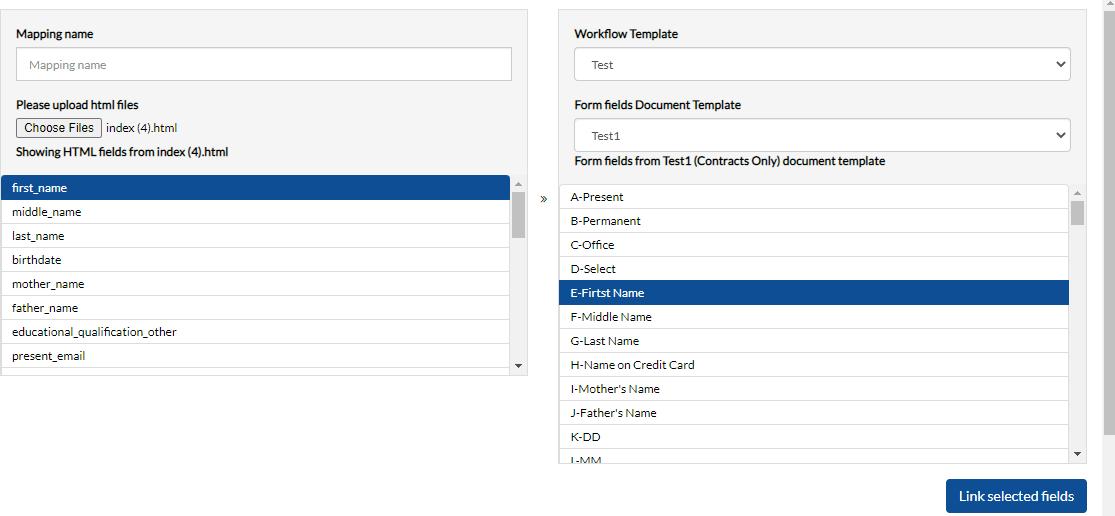
- Similarly, you may link as many fields as you want. After linking, scroll down to bottom, it will show you all linked fields and then you may click Submit to create the mapping.

Webforms
MSB offers webform support. Signers may add, edit, and delete data in a webform, and the data will be prefilled into a document ready to sign. Administrators may link an external webform document to any MSB Document Template and map the webform fields to the Document Template fields.
Steps to create webform mapping in MSB:
Prerequisites:
a) Users must have an Admin role.
b) User must have created workflow template and document template (with form filled PDF) to be used in webform mapping.
1) Navigate to Admin dropdown and select Webform mapping.

2) Click on Create new mappings.

3) MSB will automatically fetch the initial workflow and document template for mapping. However, Admin can always choose by clicking on dropdown if there are multiple options available for workflow and document templates.

4) Provide mapping name and upload the html file which contains all information for all available webform fields that can be linked.

5) After uploading, it will show the form fields which can be linked with system fields. Choose any field from the uploaded file and then choose one/more field from system fields which you want to link. Click Link Selected fields to link them.

6) Similarly, you may link as many fields as you want. After linking, scroll down to bottom, it will show you all linked fields and then you may click Submit to create the mapping.

Contact Us
Great, Thank you!
What is Letter Head in MSB application?
Can I download multiple ePaks in one go?
A letterhead is a heading on the topmost sheet of your business paper. It contains company name, address, contact details, and logo. It is meant to be used for all the documents we create and send in our commercialization. Main purpose is to convey a message to the recipient using letterhead. It’s a company’s brand identity, and the goal is for the public to be able to know who the correspondence is from by spotting the logo on the letterhead.
What are the Types of formats supported to upload the Letter Head?
- Format supported in MSB Application for Header is JPEG, JPG & PNG format
- Format supported in MSB Application for Footer is JPEG, JPG & PNG format
How do I create a Letter Head Template?
- Login using custodian account
- Click on Template and then Letter Heads
- Turn on the toggle for Header/Footer
- Click on Header and click Upload Image

- Upload windows is open now
- Select your Header file that must be in PNG, JPEG & JPG format
- Adjust size as per your requirement.
- Repeat same process for footer.
- Click on save button and assign the name “TestLetterHead”
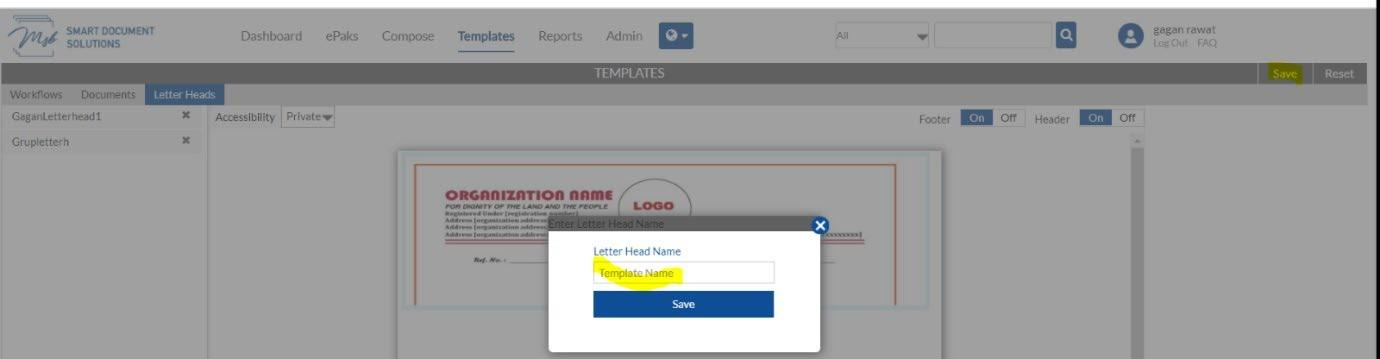
- Click on save underneath Template Name.
- Your recently created Letter Head Template will appear on left side.

- Your uploaded template will appear above to your recently created templates.
How do I create an ePak with Letter Head?
- Login with custodian account.
- Define Workflow if any.
- Select Certificate Policy
- Set Expiry Date
- Mention Subject

- Add user email address Click Attach to upload Letter Head and Select Letterhead Template, Choose recently created template.
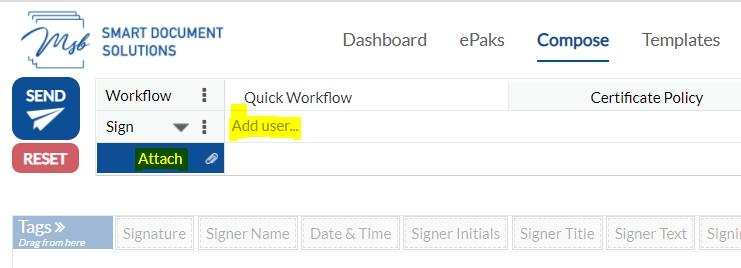
- Click Next
- Upload document from Local Computer or from Document Template
Use Replicate Feature ON if you want to use Letter Head on all pages of document that you have uploaded.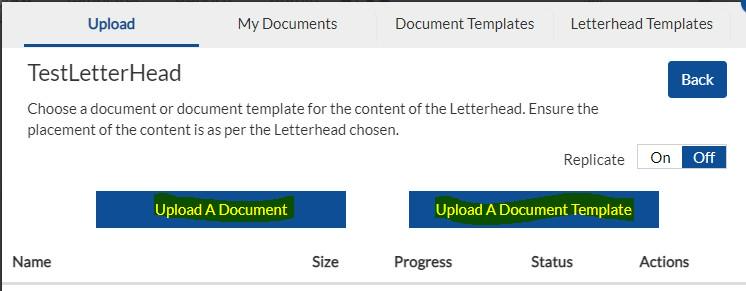
- Drop your required Tags on document and click send to finish the final step.
Letter Heads
What is Letter Head in MSB application?
A letterhead is a heading on the topmost sheet of your business paper. It contains company name, address, contact details, and logo. It is meant to be used for all the documents we create and send in our commercialization. It’s a company’s brand identity, and the goal is for the public to be able to know who the correspondence is from by spotting the logo on the letterhead.
Format supported in MSB Application for Header and Footer is JPEG, JPG & PNG format
How do I create a Letter Head Template?
1) Login using custodian account
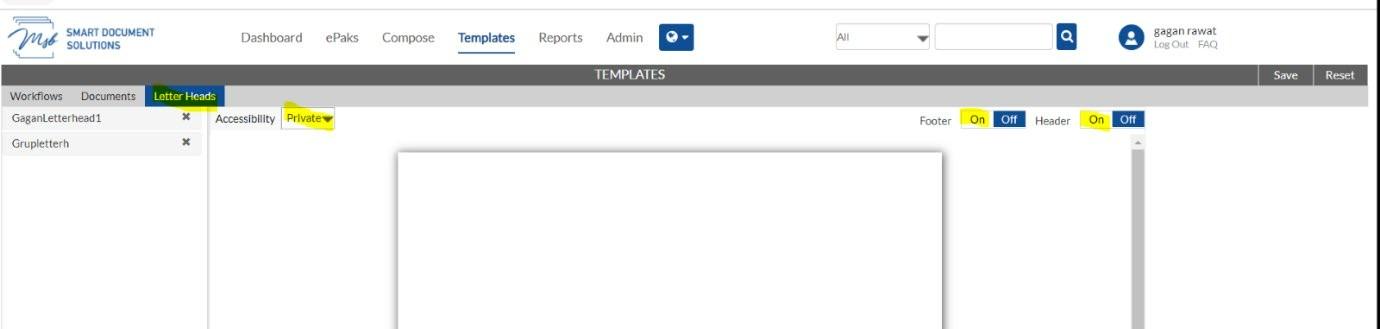
2) Click on Template and then Letter Heads. Click on Create.
3) Turn on the toggle for Header/Footer and click Upload Image.


4) Upload windows is open now. Select your Header file that must be in PNG, JPEG & JPG format.
5) Adjust size as per your requirement.
6) Click on the save button and assign any name.

How do I create an ePak with Letter Head?
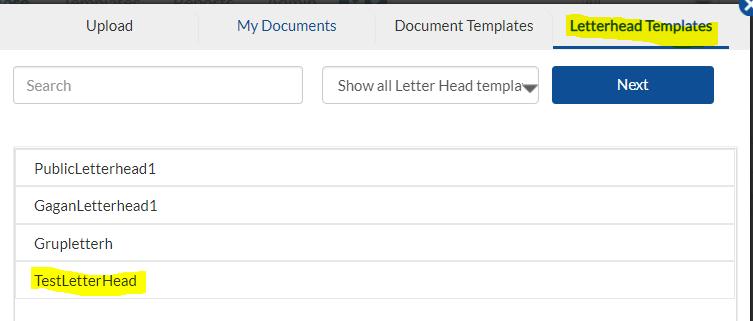
Login to the custodian account and click on Compose. Select Document Templates and choose any document template.
Select ‘Use with Letter head’ and choose the letter head from the list displayed.

Use Replicate Feature ON if you want to use Letter Head on all pages of document that you have uploaded.Drop your required Tags on document and click send an ePak.
Contact Us
Great, Thank you!
Rubber Stamp
What is Rubber Stamp?
The purpose of Rubber Stamp is to approve, endorse, or dispose of as a matter of routine or at the command of another. A rubber stamp in MSB application is a soft copy with a name, date, or symbol on it. You apply it on to a document to show that the document has been officially dealt with. This is equivalent to Rubber Stamp device we use in our official work to make document for legal authentication.
Can a signer use the Rubber Stamp Feature?
Yes, it is meant for all stake holders in MSB Applications regardless the roles assigned to Users. It is not essential to keep Admin/Custodian account to materialize the Rubber Stamp.
Can I Share my uploaded Rubber Stamp, and can I use shared Rubber Stamp with me?
Yes, it can be done using share feature of rubber stamp and we can also use the stamp shared with us. You will get all shared Rubber Stamp in “Shared with me” section.
- To share your uploaded stamp
- Click Share icon
- Add user and click share button

- Other users will get your shared stamp in “Shared with me”.

How do I upload the Rubber Stamp?
- Go to Edit Profile of user account
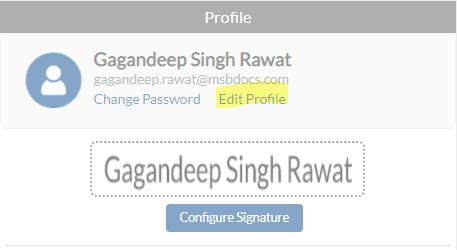
- Click on Rubber Stamp
- Click Add Rubber Stamp

- Click on Upload Image.
- Select the file and click open.
- Assign name to Rubber Stamp and adjust Width and Height as per requirement. Dimension can be adjusted by scrolling Blue Round Button (up and down).
- Click Create.
How do I drop a Rubber Stamp Tag?
When a custodian is in process of composing and ePak, the custodian can see new tag of rubber stamp as well. The custodian can simply drag and place the tag anywhere over document place or can drag multiple. One can be deployed for custodian and second for signer.
Can we apply a rubber stamp to an existing ePak?
You cannot apply the rubber stamp to existing ePaks that are in completed/Pending/In progress stage. You may only drop a Rubber Stamp Tag for new ePaks if it has been enabled.
Rubber Stamp
What is Rubber Stamp?
The purpose of Rubber Stamp is to approve, endorse, or dispose of as a matter of routine or at the command of another. A rubber stamp in MSB application is a soft copy with a name, date, or symbol on it. You apply it on to a document to show that the document has been officially dealt with. This is equivalent to Rubber Stamp device we use in our official work to make document for legal authentication.
All stake holders in MSB Applications can use this feature regardless of their role.
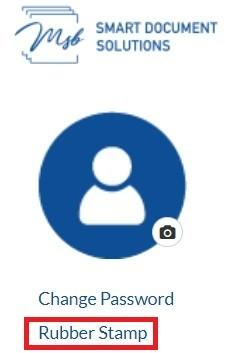
How do I upload the Rubber Stamp?
1. Go to Profile of user account by clicking on Manage and click on Rubber Stamp.

2. Click on ‘Add Rubber Stamp’

By using the share feature, you can share the uploaded rubber stamp with other users, and we can also use the stamp shared with us. You will get all shared Rubber Stamp in “Shared with me” section.
3. Click on Upload from Device. Assign name to Rubber Stamp and adjust Width and Height as per requirement. Click Confirm.

How do I drop a Rubber Stamp Tag?
When a custodian is in process of composing and ePak, the custodian can see new tag of rubber stamp as well. The custodian can simply drag and place the tag anywhere over document place or can drag multiple. One can be deployed for custodian and the second for signer.
You cannot apply the rubber stamp to existing ePaks that are in completed/Pending/In progress stage. You may only drop a Rubber Stamp Tag for new ePaks if it has been enabled.
Contact Us
Great, Thank you!
QR Code
What is QR Code?
A QR Code (abbreviated from Quick Response code) is a two-dimensional barcode that is readable by smartphones. A barcode is a machine-readable optical label that contains information about the item to which it is attached. QR Codes may be used to display text to the user, to open a URL, save contact to the address book or to compose text messages.
A QR code consists of black squares arranged in a square grid on a white background which can be ready by the smartphone, you need appropriate software installed on your phone. For Android-based devices, you can use Barcode Scanner . On iOS-Devices like iPhones there are also QR Code readers available on the AppStore. On Firefox OS try QR Code Scanner. On Symbian devices, you can use Mobiletag barcodes reader for example.
How can a custodian use QR Code tag?
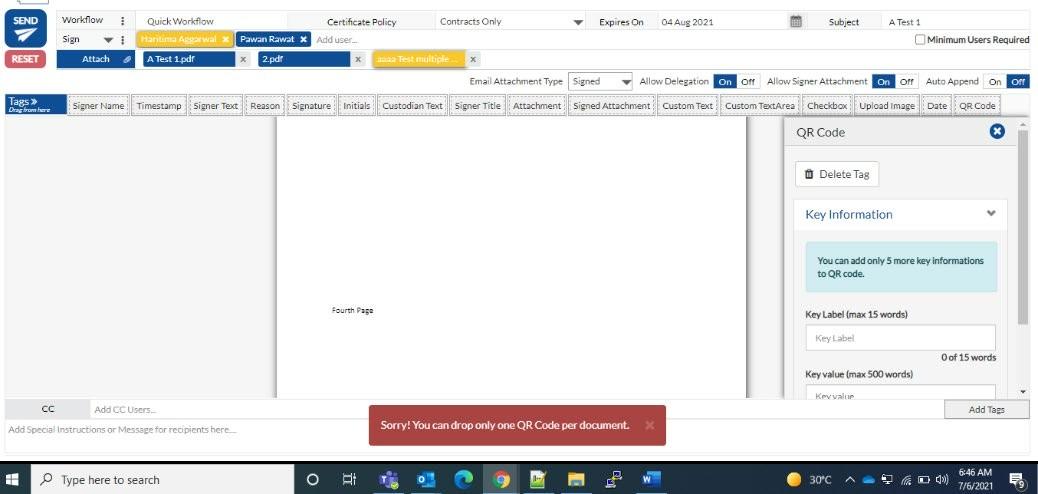
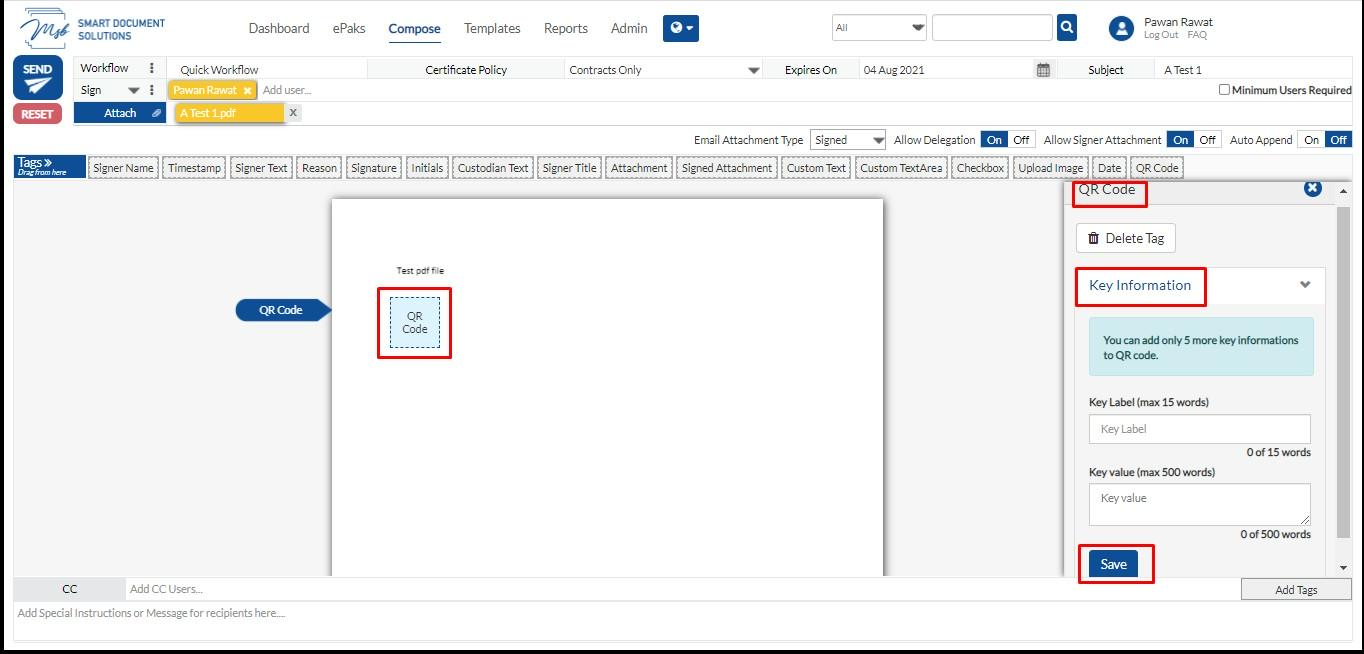
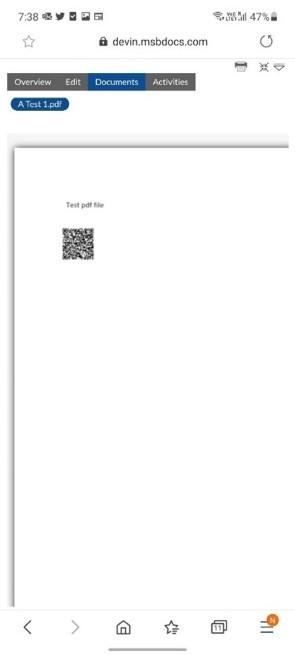
A custodian can put a QR code tag in the document along with other custodian tags like signature, timestamp etc. and put in Key label and Key Value pairs in the QR code values as shown in the below snippet. QR code tag is only for the custodian, signer cannot drop this tag on the document.
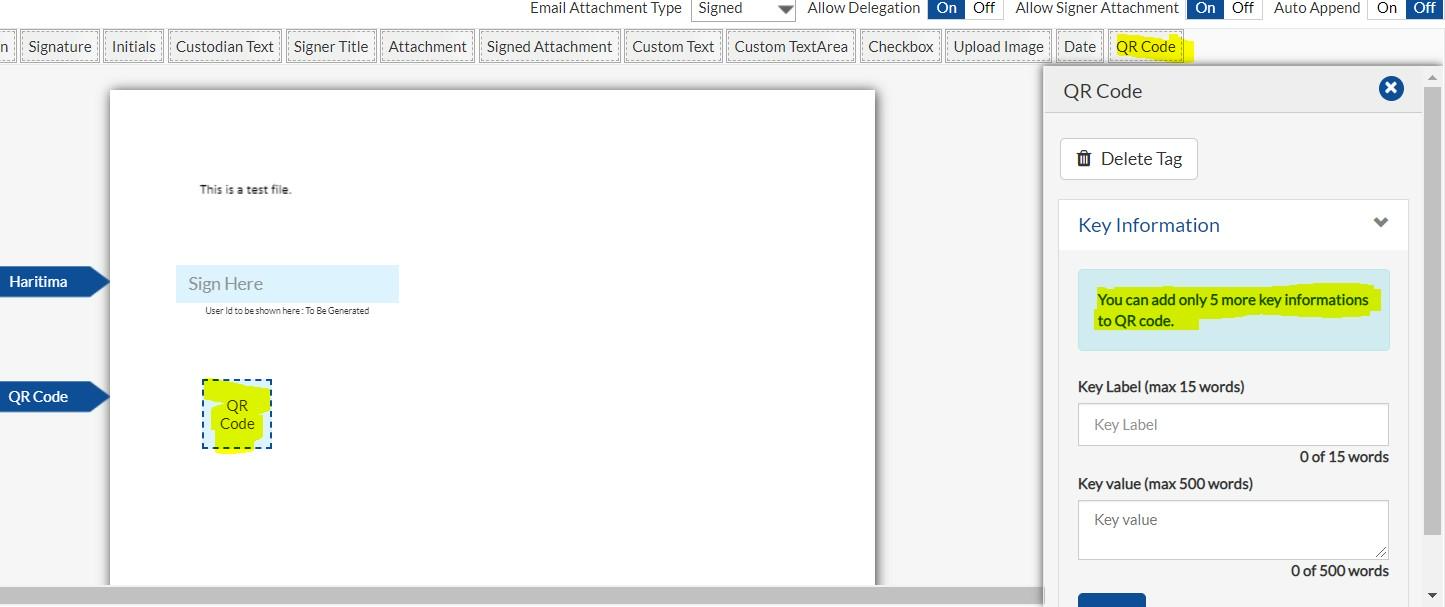
Note: Custodian can only drop one QR code tag in one document. Custodian will get an error message “Sorry you can drop only one QR Code tag per document” if he drops more than one QR code tag in one document.
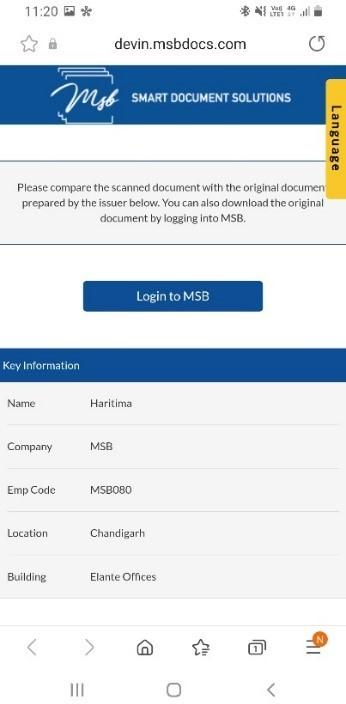
About Key Information
Key Information is the set of multiple key labels and key values which is saved by the custodian while creating an ePak. Custodian will enter some key value information at time of creation of ePak. This info will be stored in the database and will be fetched after the validation of QR code.
How we can add the Key Information for QR Code.
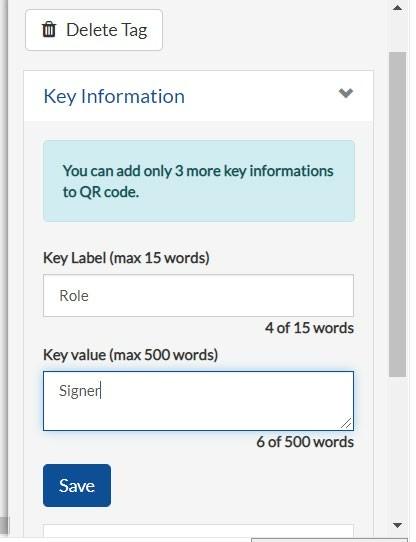
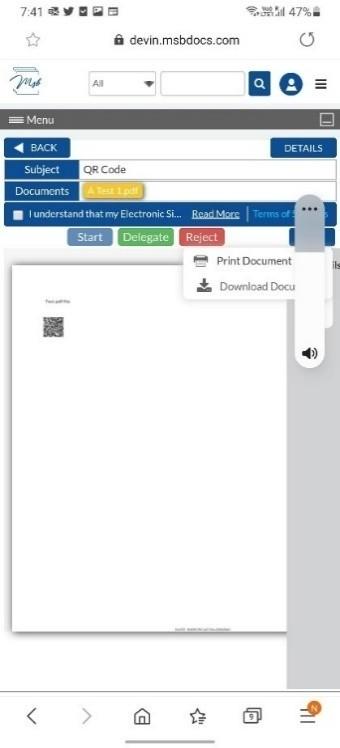
While composing an ePak custodian can see the QR Code box at the right side of the window as shown below and after entering the Key Label and Values he can click on the save button to save it.
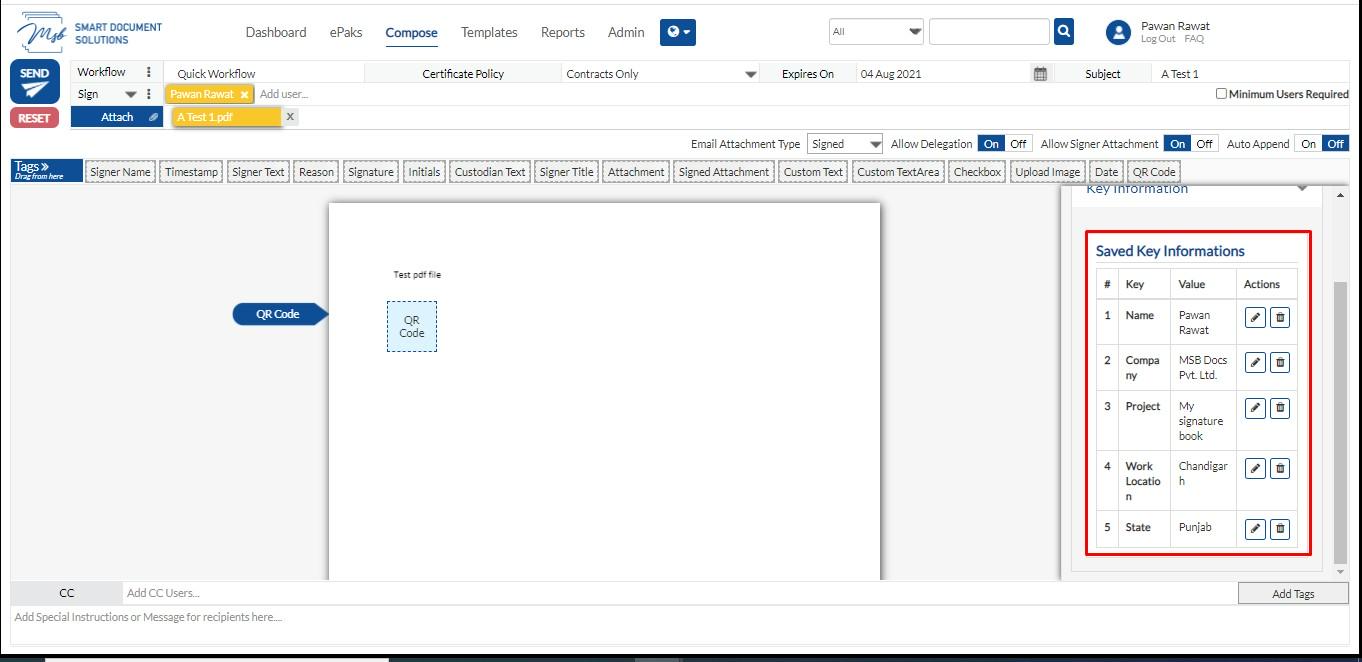
Custodian can add up to 5 key pair information in one QR code for the verification of the ePak.
How can I edit the Key Information?
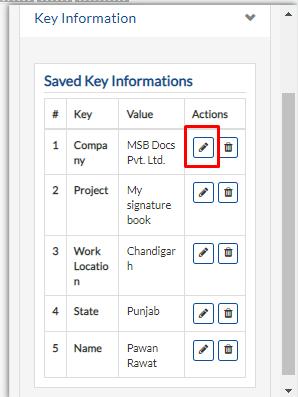
Custodian can click on the Edit button under the Actions to edit the Label and the value.
How can I delete the Key Information?
Custodian can click on the delete button under the Actions to delete the information.
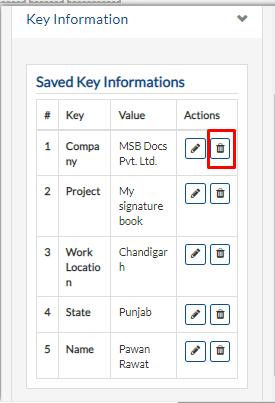
Note: Once the epak is created and sent for the signature then we cannot edit and delete the Key Information. It can only be edited and deleted while composing an ePak.
Scanning QR Code
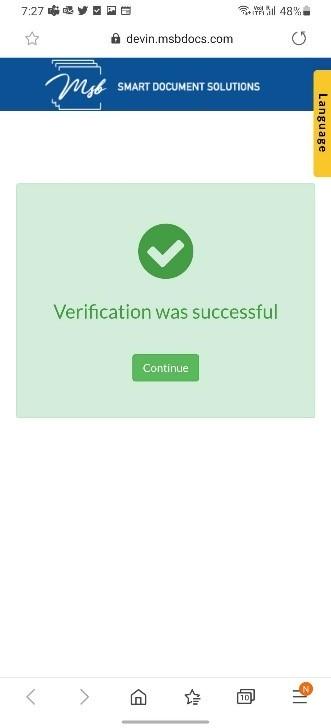
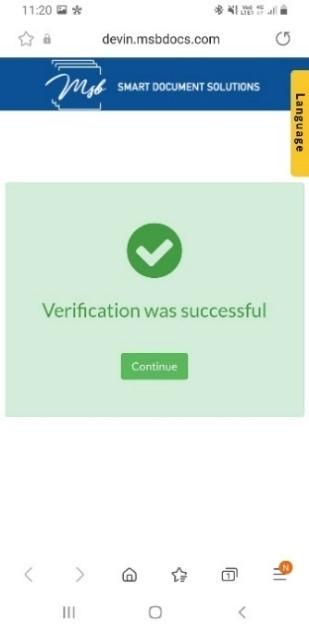
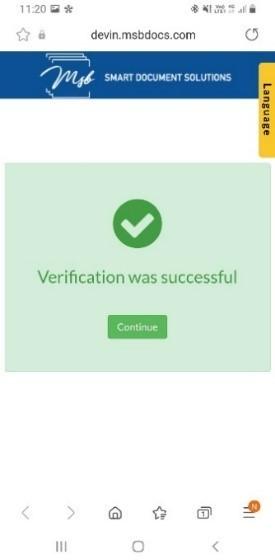
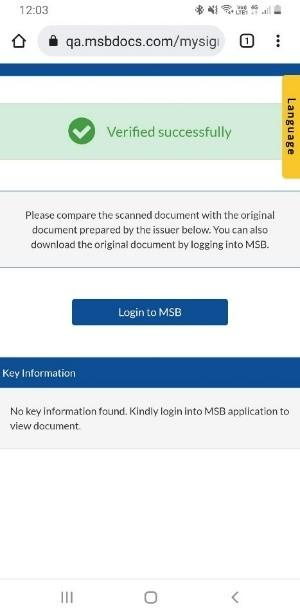
Once the ePak is created and sent for the signature then we can scan the QR code for the verification. Scan the QR code from your device and it will redirect you to the MSB page wherein epak was originally got processed, which will show you the message that “Verification was successful” and you need to click on the Continue button to see the key information that was entered by the custodian while creating the ePak.
Verification Screenshot from Mobile Device
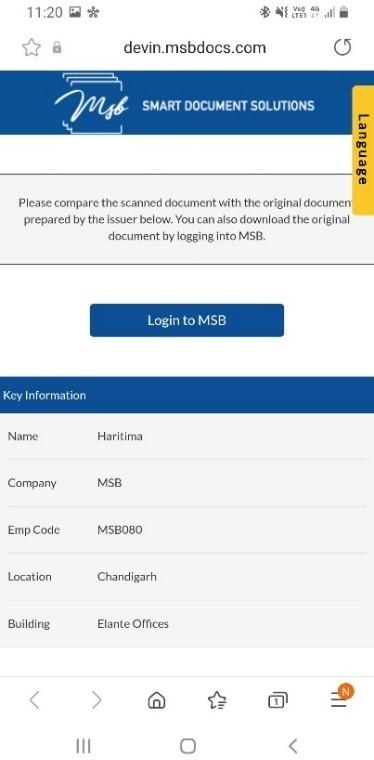
Key information screenshot from Mobile device
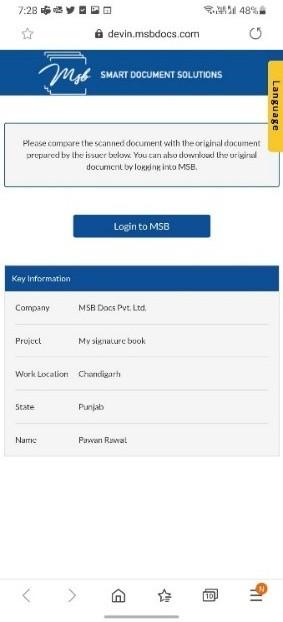
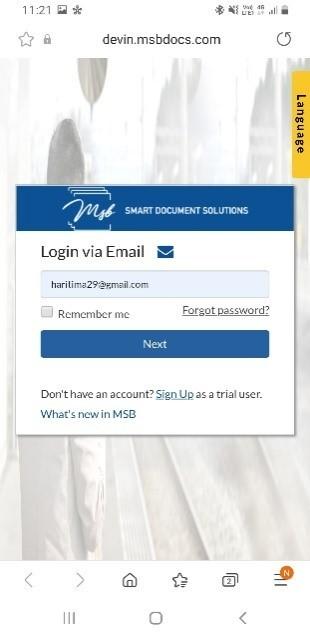
What will happen if I tap on the “Login to MSB” Button on the Key Information page.
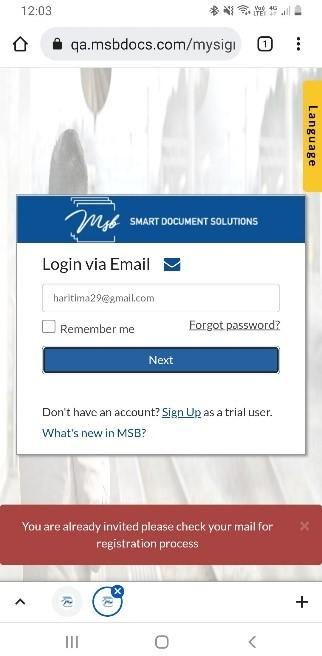
After tapping the “Login to MSB” button it will redirect me to the MSB application and ask the login credential to log in to MSB
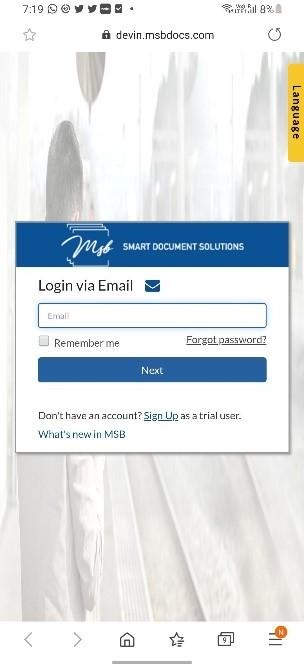
Provide email
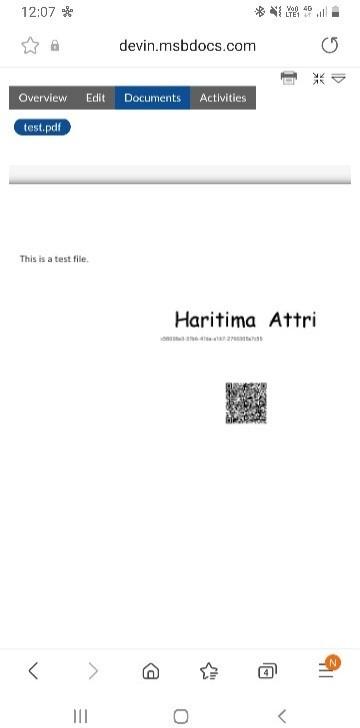
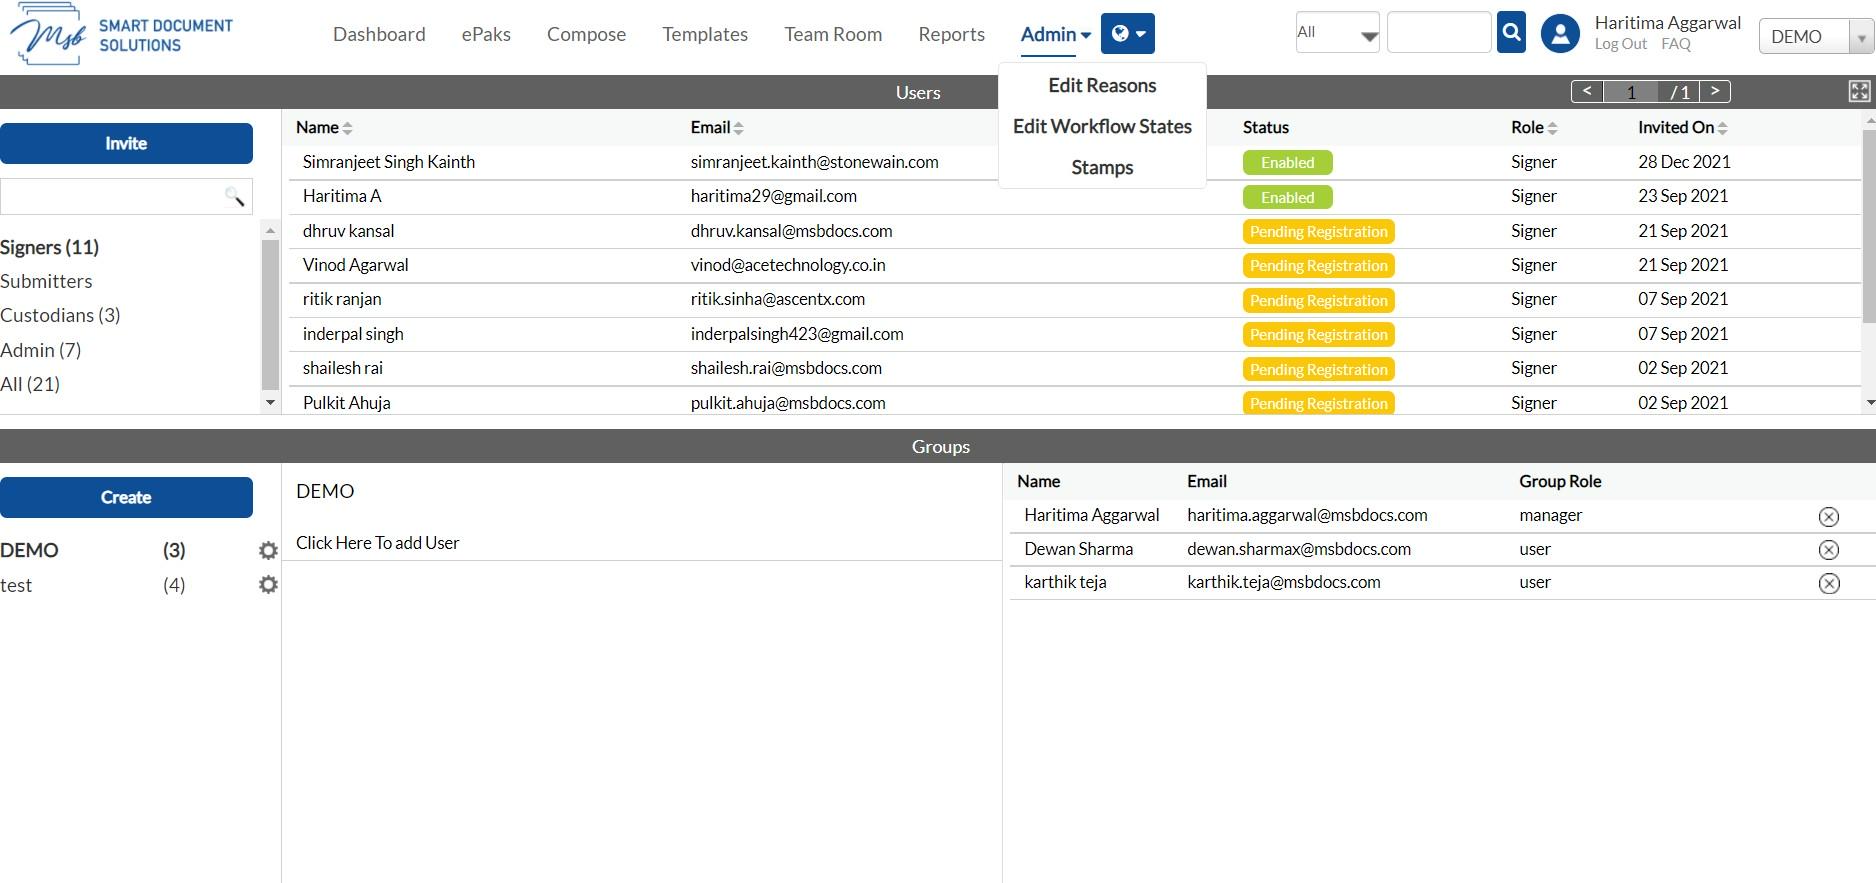
Login with your credentials either Custodian or Admin it will take me to the document tab and show the preview of the document as shown below.
And if the document is not complete, User will provide the signer credential then it will redirect user to the signing page of the ePak to complete the signing process.
Provide email
Document is in Completed state:Signer scans the QR code
The original signer when scans the QR code then, it would show Verification completed, share the Key Information and Login to MSB Login with your signer credentials
Verification Completed
Key Information
Click on Login to MSB
Once the Original signer logs in to MSB, it will redirect the user to Documents page as shown below:

Custodian Scans the QR Code after completion
The custodian when scans the QR after completion then, It should show Verification completed, share the Key Information and Login to MSB Login with the credentials
Verification Completed
Key Information
Click on Login to MSB

Once the custodian logs in to MSB, it will directly take the user to Documents page as shown.
Document is in pending state
If I login as a signer, then it will redirect me to signing page to sign the ePak and if user has already signed then it will be redirected to the Documents page
Non-registered signer scans the QR Code then what will that user see?
When a non-registered user scans the QR code, it will redirect user to the below page.
Once the user clicks on Login to MSB. Here the application shows a notification for user to register in the application and the user will receive an email notification to register on the application.
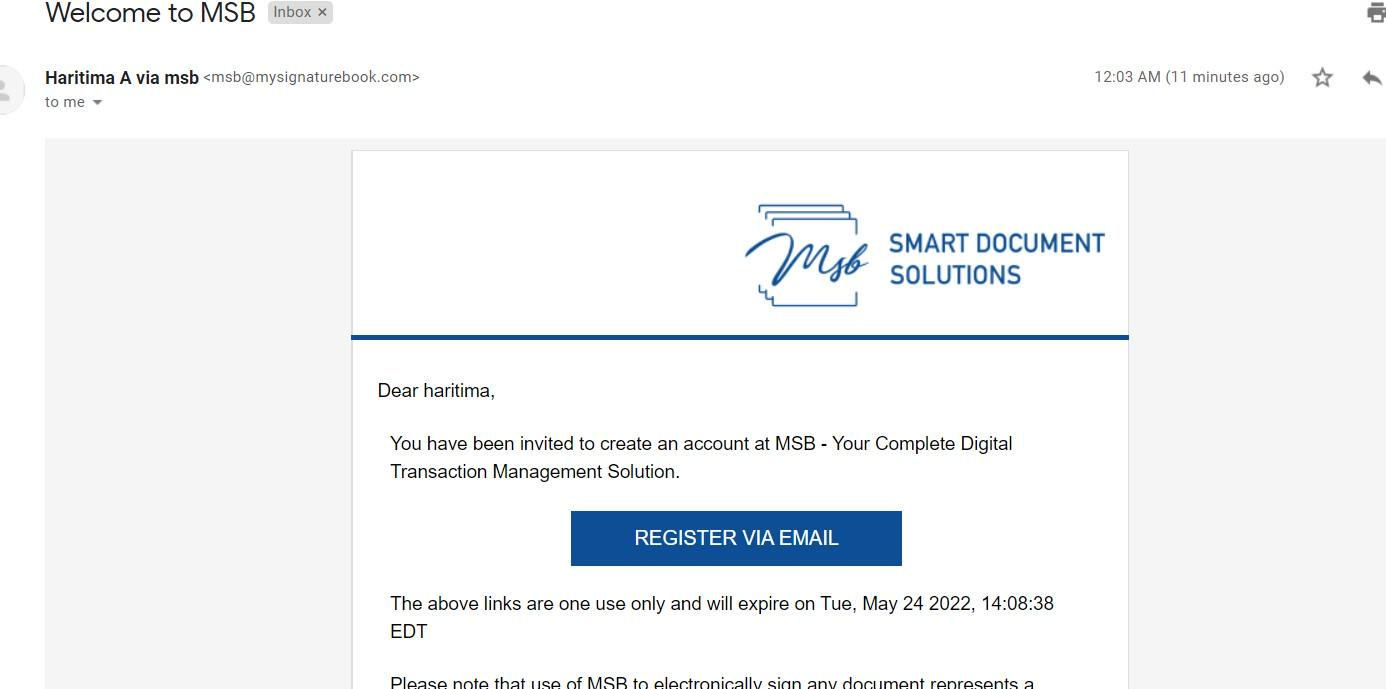
Once the user registers on the application and perform the signing on the received ePak. The workflow will be same as a registered signer.
QR Code
What is QR Code?
A QR Code (abbreviated from Quick Response code) is a two-dimensional barcode that is readable by smartphones. A barcode is a machine-readable optical label that contains information about the item to which it is attached. QR Codes may be used to display text to the user, to open a URL, save contact to the address book or to compose text messages.
A QR code consists of black squares arranged in a square grid on a white background which can be ready by the smartphone, you need appropriate software installed on your phone. For Android-based devices, you can use Barcode Scanner . On iOS-Devices like iPhones there are also QR Code readers available on the AppStore. On Firefox OS try QR Code Scanner. On Symbian devices, you can use Mobiletag barcodes reader for example.
How can a custodian use QR Code tag?
A custodian can put a QR code tag in the document along with other custodian tags like signature, timestamp etc. and put in Key label and Key Value pairs in the QR code values as shown in the below snippet. QR code tag is only for the custodian, signer cannot drop this tag on the document.

Note: Custodian can only drop one QR code tag in one document. Custodian will get an error message “Sorry you can drop only one QR Code tag per document” if he drops more than one QR code tag in one document.
About Key Information
Key Information is the set of multiple key labels and key values which is saved by the custodian while creating an ePak. Custodian will enter some key value information at time of creation of ePak. This info will be stored in the database and will be fetched after the validation of QR code. While composing an ePak, custodian can see the QR Code box and after entering the Key Label and Values he can click on the confirm button to save it.


Custodian can add up to 5 key pair information in one QR code for the verification of the ePak. Custodian can click on the 3 dots under Saved Keys to edit/delete the Label and the value.

Once the ePak is created and sent for the signature then we can scan the QR code for the verification. Scan the QR code from your device and it will redirect you to the MSB page wherein epak was originally got processed, which will show you the message that “Verification was successful” and you need to click on the Continue button to see the key information that was entered by the custodian while creating the ePak.

Once the custodian logs in to MSB, it will directly take the user to Documents page.

Contact Us
Great, Thank you!
Stamp Paper
Single Stamp Paper
Login to the application with your Admin credentials.
- Click on Admin tab, click on the drop-down arrow, here click on Stamps feature.
Stamp paper Dashboard is displayed in the next window.
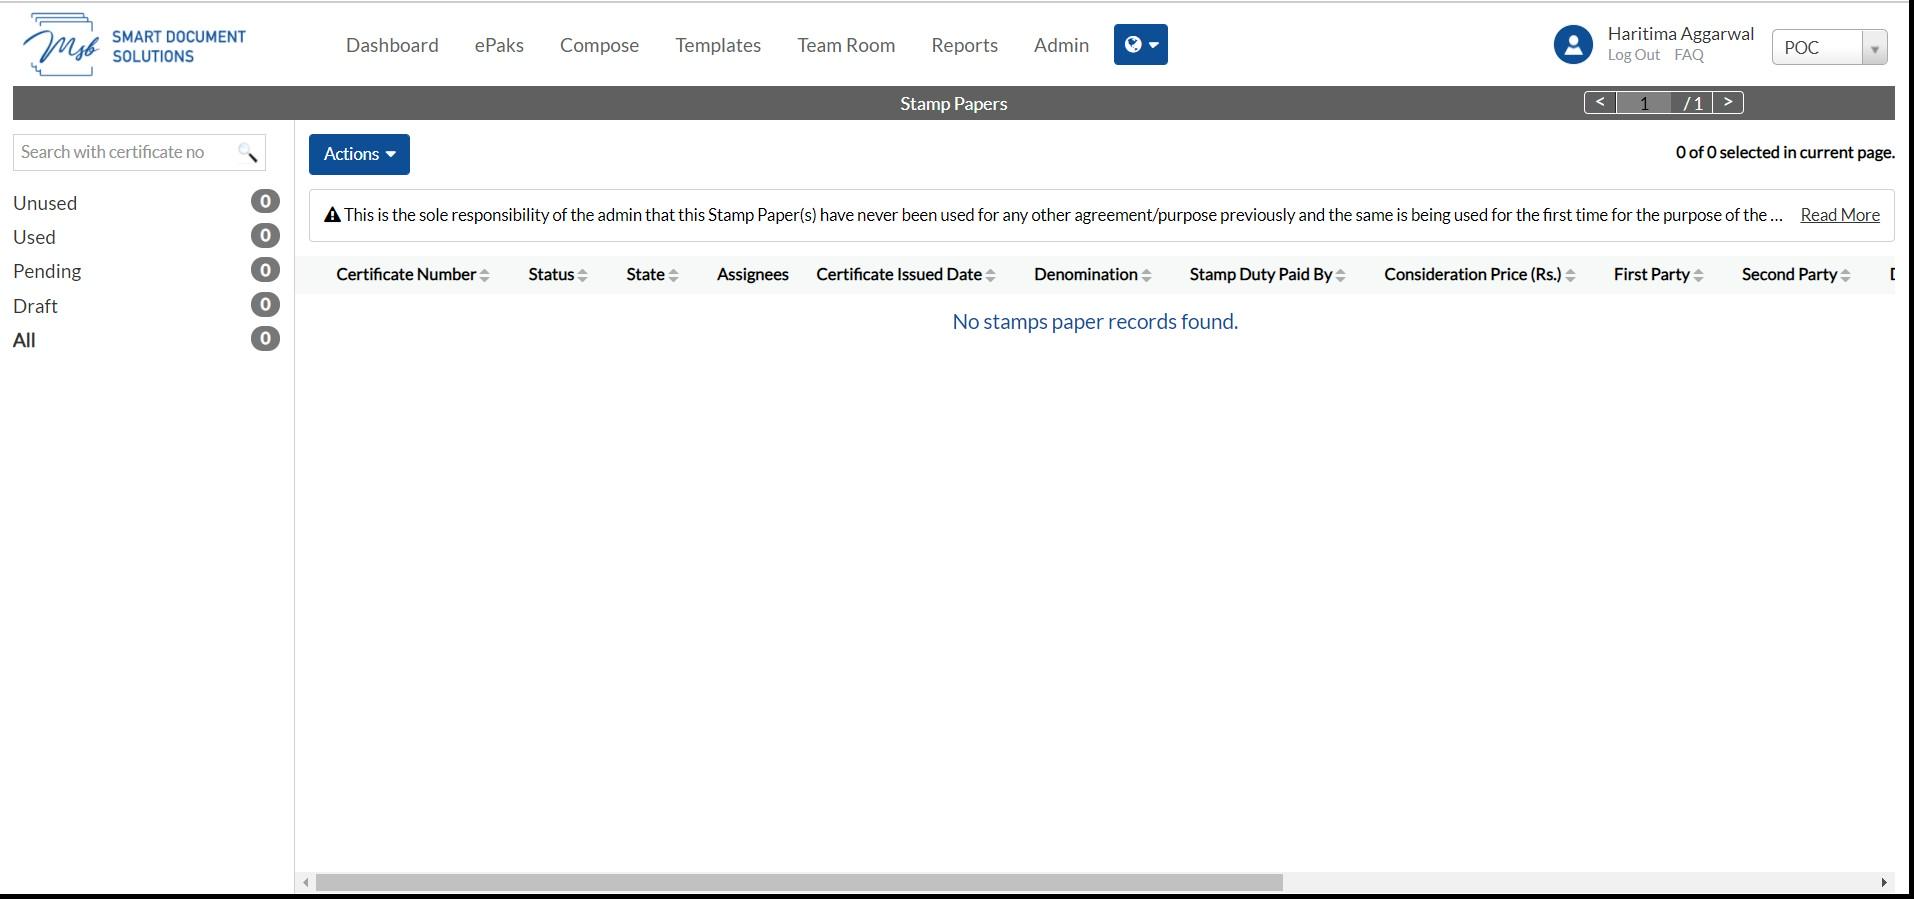
Click on “Actions” button and click on “Add” to upload a stamp paper into the system.
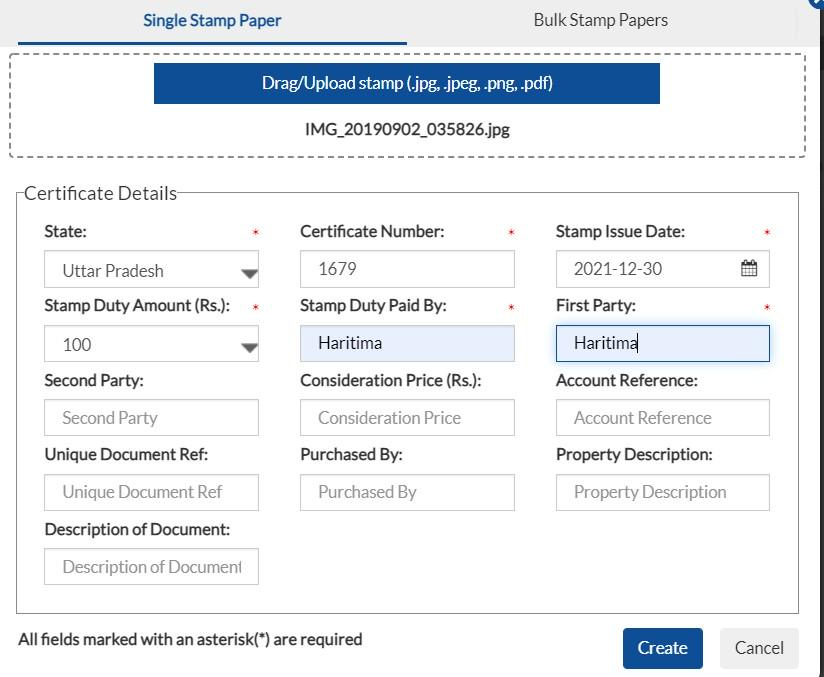
Here you can upload the scanned image and fill up the certificate details and click on create.
How to edit the Stamp Papers
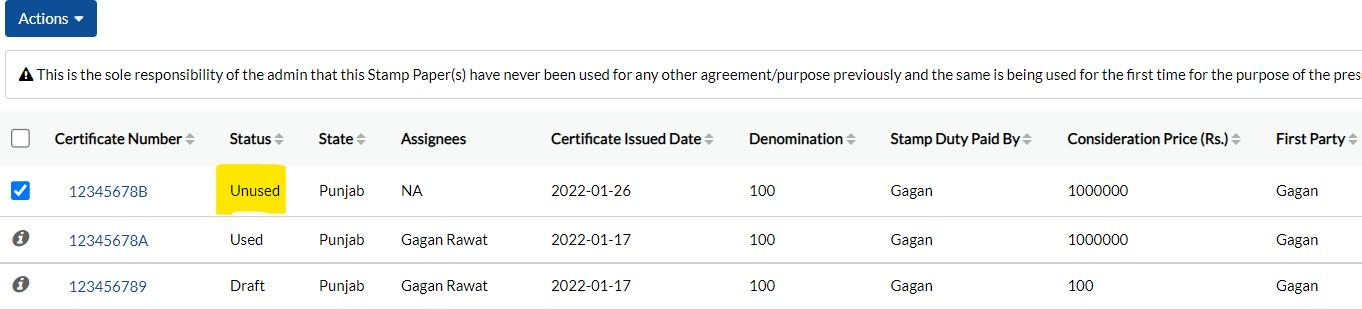
Select the unused stamp papers
Click on Actions and click on edit
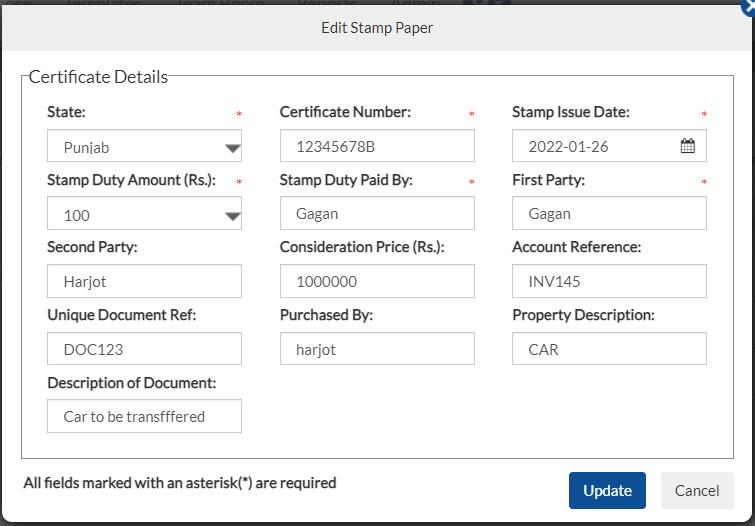
Do the required changes and click Update.
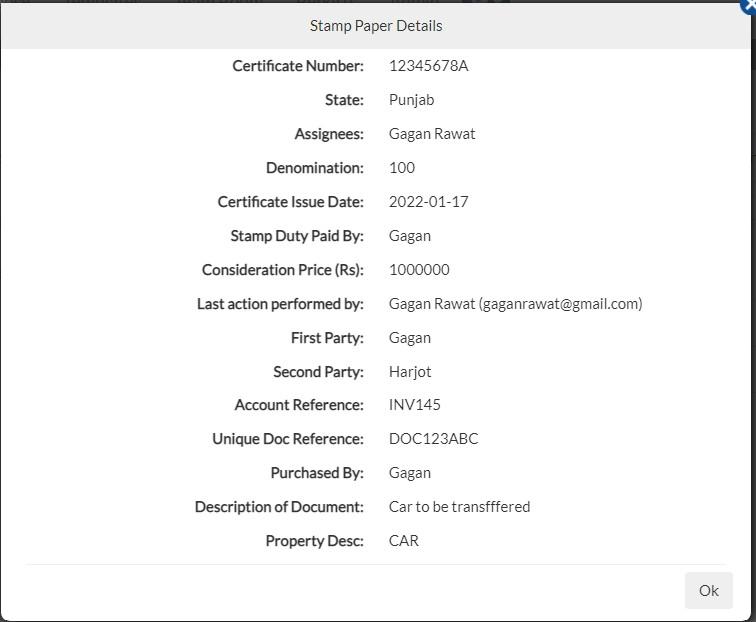
How to View the details filled in Stamp Papers
You can simply click on any Certificate Numbers of stamp papers to view the details.
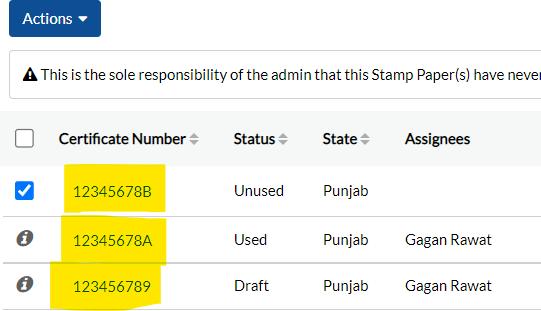
Once you click then you get below details
How to Delete the Stamp Papers
Select the unused Stamp papers which you want to delete. Once you have selected the stamp paper then click on Actions button and click on delete You need confirm by clicking on Yes Button.

Note:-it will be permanently deleted from admin account.
How to Assign a Stamp Paper to other users
Assign the same to any user or group to be used to create an epak.Select the uploaded stamp paper and click on Actions button and select the desired option.
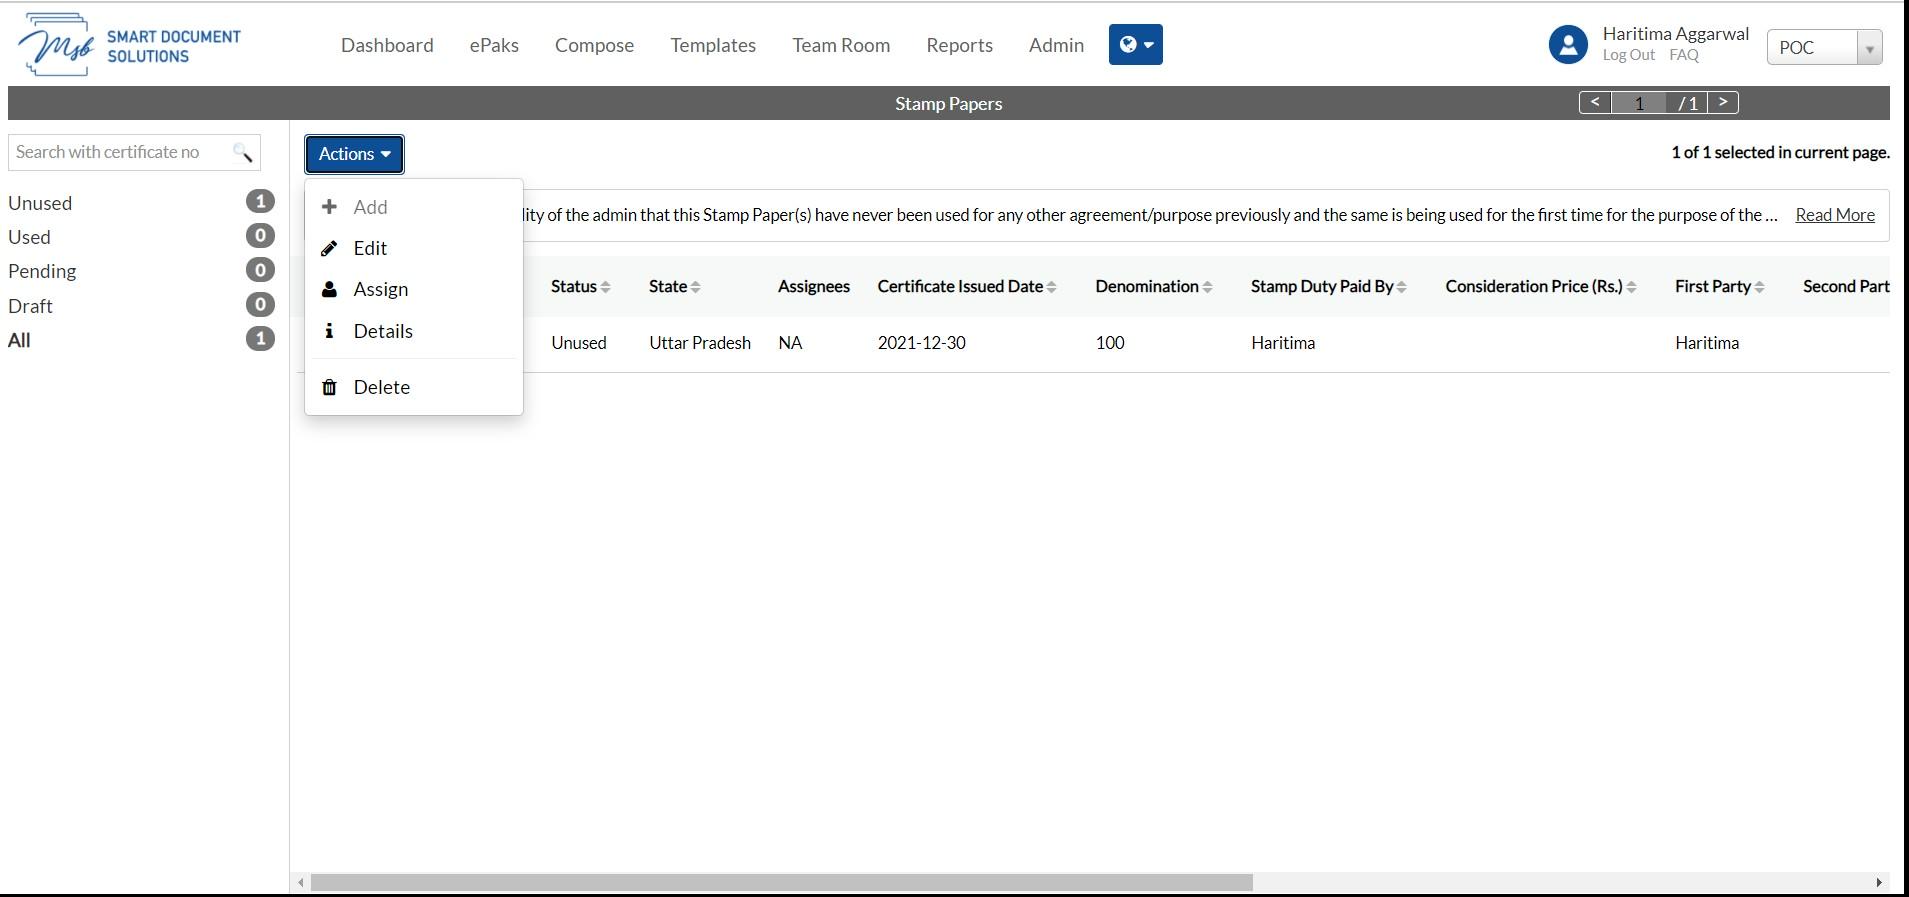
Click on Assign and add the details of the assignees:
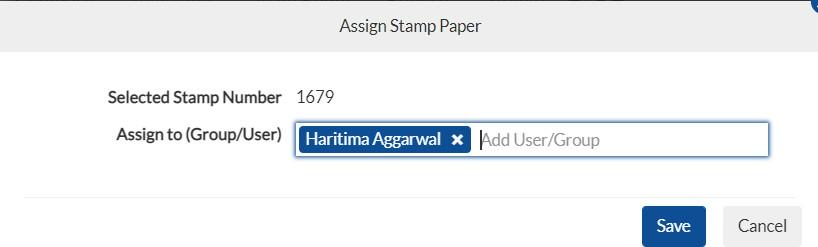
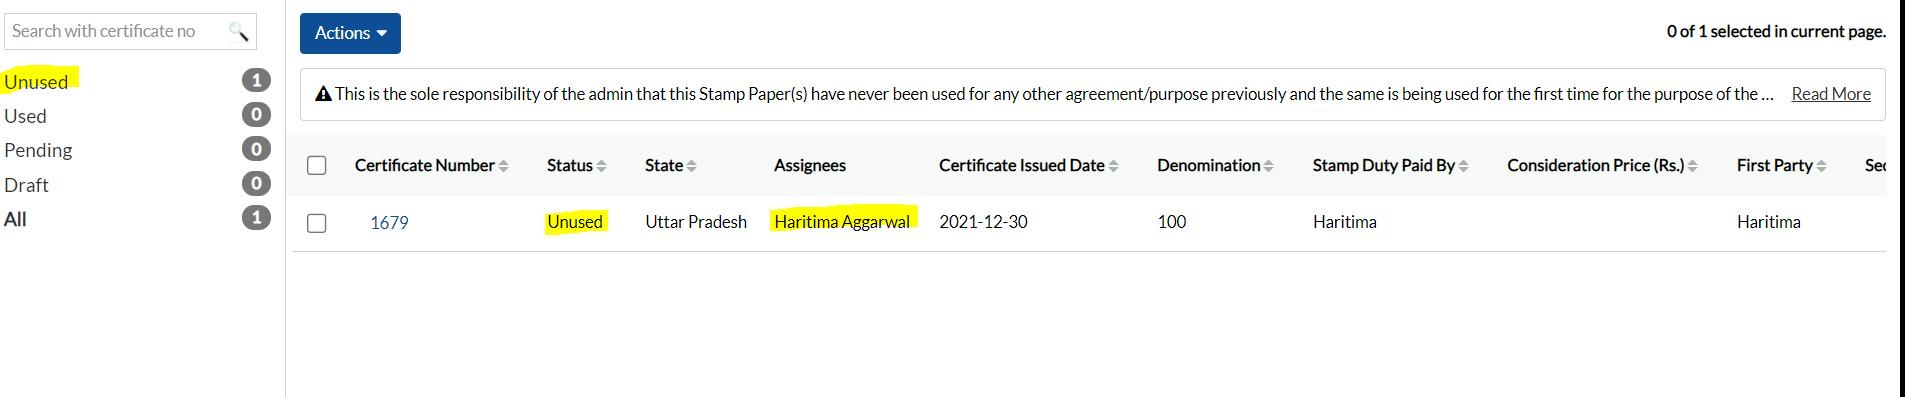
Once assigned the details of assignee are updated and the status is updated for the stamp paper Since the stamp paper is not used yet, its status will be unused.
Single Stamp Paper
1) Login to the application with your Admin credentials.
2) Click on the Addon tab, click on the drop-down arrow, and click on Stamps. Stamp paper Dashboard is displayed in the next window.
3) Click on “Add” to upload a stamp paper into the system.

4) Upload the scanned image and fill up the certificate details. Accept the terms and conditions and click on create.

How to edit the Stamp Papers
Select the unused stamp papers and click on Edit.

Edit the Stamp paper, accept the terms and click Update.

How to View the details filled in Stamp Papers
Select any Certificate Number of stamp papers and click on Details to view the details.

How to Delete the Stamp Papers
Select the unused Stamp papers which you want to delete and click on delete. Confirm the action by clicking on the Confirm Button.
How to Assign a Stamp Paper to other users
Assign the stamp paper to any user or group to be used to create an epak. Select the uploaded stamp paper and click on Assign. Add the details of the assignees and click Confirm.


Once assigned the details of assignee are updated and the status is updated for the stamp paper
Since the stamp paper is not used yet, its status will be unused.
Contact Us
Great, Thank you!
How do I access a report of ePaks sent to me as a Signer?
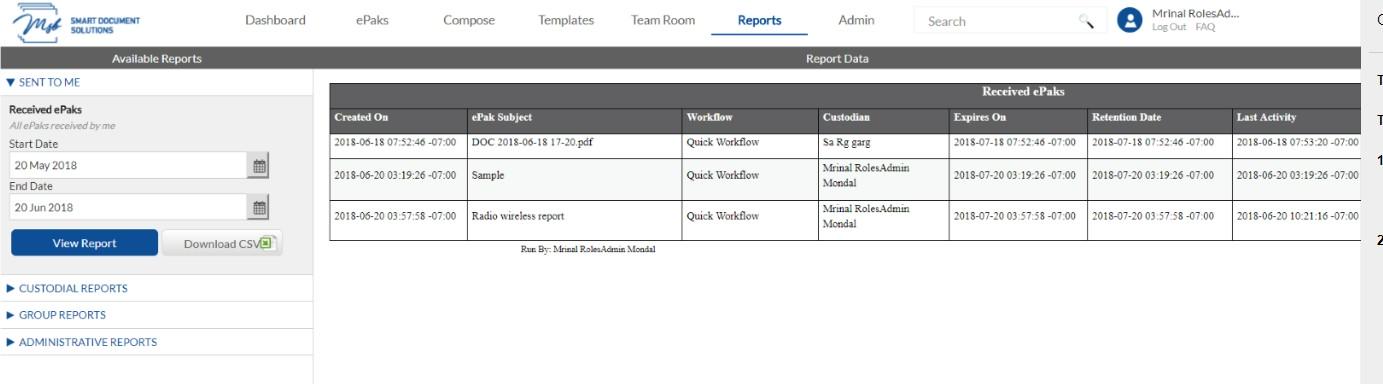
To access a report about ePaks sent to you click the Report link in the navigation bar.
Then click the Sent to Me link on the left side of the page. The Received ePaks report tool will open. Enter a start date and end date. Click View Report button. The report data will be shown on the screen. Alternatively, you may click the Download CSV button to download the report data in a CSV file.
How do I access a report of ePaks sent to me as a Signer?
Click the Reports link in the navigation bar and select ‘Sent to Me’. The Received ePaks report will be displayed. Enter a start date and end date and Click Download to download the report data.

Contact Us
Great, Thank you!
How do I access reports of ePaks that belong to me as a Custodian?
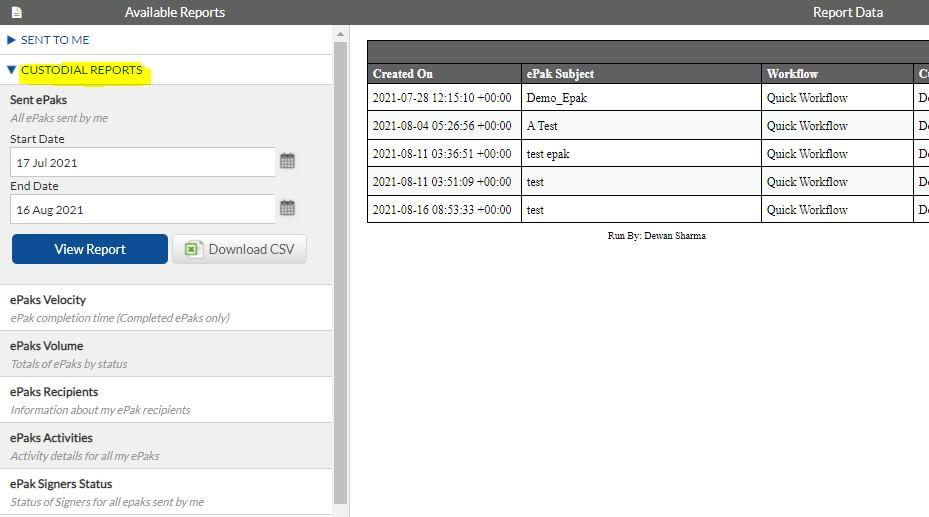
To access reports about ePaks that you are Custodian of click the Report link in the navigation bar. Then click the Custodial Reports link on the left side of the page. A list of ePak reports will be displayed.
Select the desired report. The report tool will open. Enter a start date and end date. Click View Report button. The report data will be shown on the screen. Alternatively, you may click the Download CSV button to download the report data in a CSV file.
The reports available to Custodians are:
- Sent ePaks All ePaks sent by me
- ePaks Velocity ePak completion time
- ePaks Volume Totals of ePaks by status
- ePaks Recipients Information about my ePak recipients
- ePak Activities Activity details for my ePaks
- ePak Signer Status Status of Signers for all ePaks sent by me
How do I access reports of ePaks that belong to me as a Custodian?
Click the Reports link in the navigation bar and select ‘Custodial Reports’. A list of ePak reports will be displayed. Select the desired report, enter a start date, and end date and click Download to download the report data.The reports available to Custodians are:
– Sent ePaks – All ePaks sent by me
– ePaks Velocity – ePak completion time (Completed ePaks only)
– ePaks Volume – Totals of ePaks by status
– ePaks Recipients – Information about my ePak recipients
– ePak Activities – Activity details for my ePaks
– ePak Signer Status – Status of Signers for all ePaks sent by me
Contact Us
Great, Thank you!
How do I access reports of ePaks that belong to the Groups that I manage?
To access reports about ePaks that belong to Custodians that you are manager of click the Report link in the navigation bar.
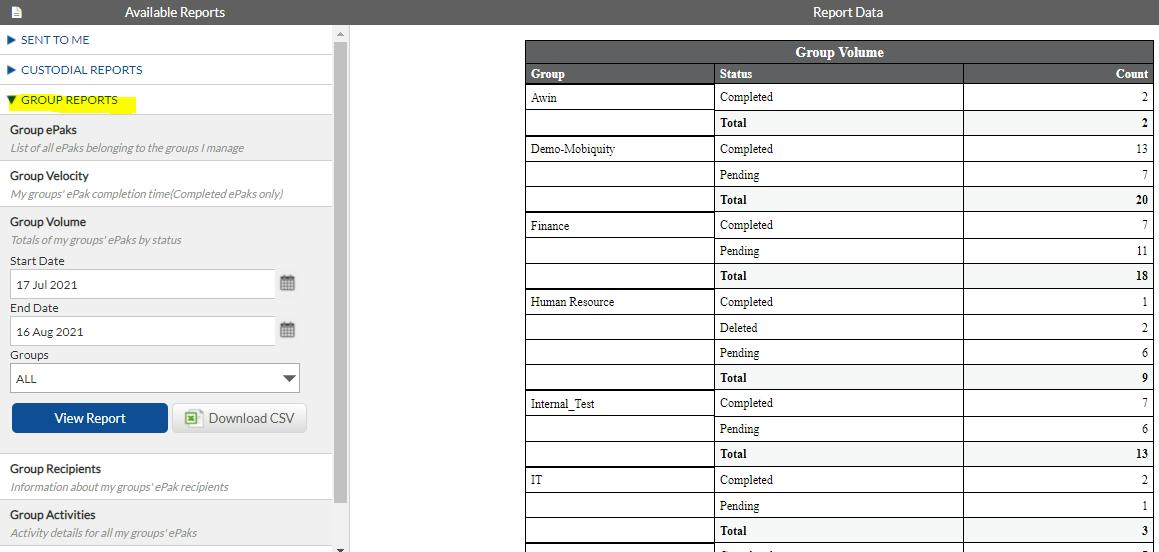
Then click the Group Reports link on the left side of the page. A list of ePak reports will be displayed. Select the desired report. The report tool will open. Enter a start date and end date. Click View Report button. The report data will be shown on the screen. Alternatively, you may click the Download CSV button to download the report data in a CSV file.
The reports available to Group managers are:
- Group ePaks List of all ePaks belonging to the groups I manage
- Group Velocity My groups’ ePak completion time
- Group Volume Totals of my groups’ ePaks by status
- Group Recipients Information about my groups’ ePak recipients
- Group Activities
Activity details for all my groups’ ePaks Please note that you may view a report for all groups that you manage, or you may view a report for a single group by using the groups dropdown menu in the report tool.
How do I access reports of ePaks that belong to the Groups that I manage?
Click the Reports link in the navigation bar and select ‘Group Reports’. A list of ePak reports will be displayed. Select the desired report, enter a start date, and end date, select the group from dropdown and click the Download button to download the report data.
The reports available to Group managers are:
– Group ePaks – List of all ePaks belonging to the groups I manage
– Group Velocity – My groups’ ePak completion time (Completed ePaks only)
– Group Volume – Totals of my groups’ ePaks by status
– Group Recipients – Information about my groups’ ePak recipients
– Group Activities – Activity details for all my groups’ ePaks